Benco vacuumpump overhauling update 03072015 dating the pump. Yes it's very old!
3 posters
Page 1 of 1
 Benco vacuumpump overhauling update 03072015 dating the pump. Yes it's very old!
Dear forum members,
I've decided to overhaul te vacuumpump first before finishing the trolley.
The bearings made some noise and showed some "heavy" points.
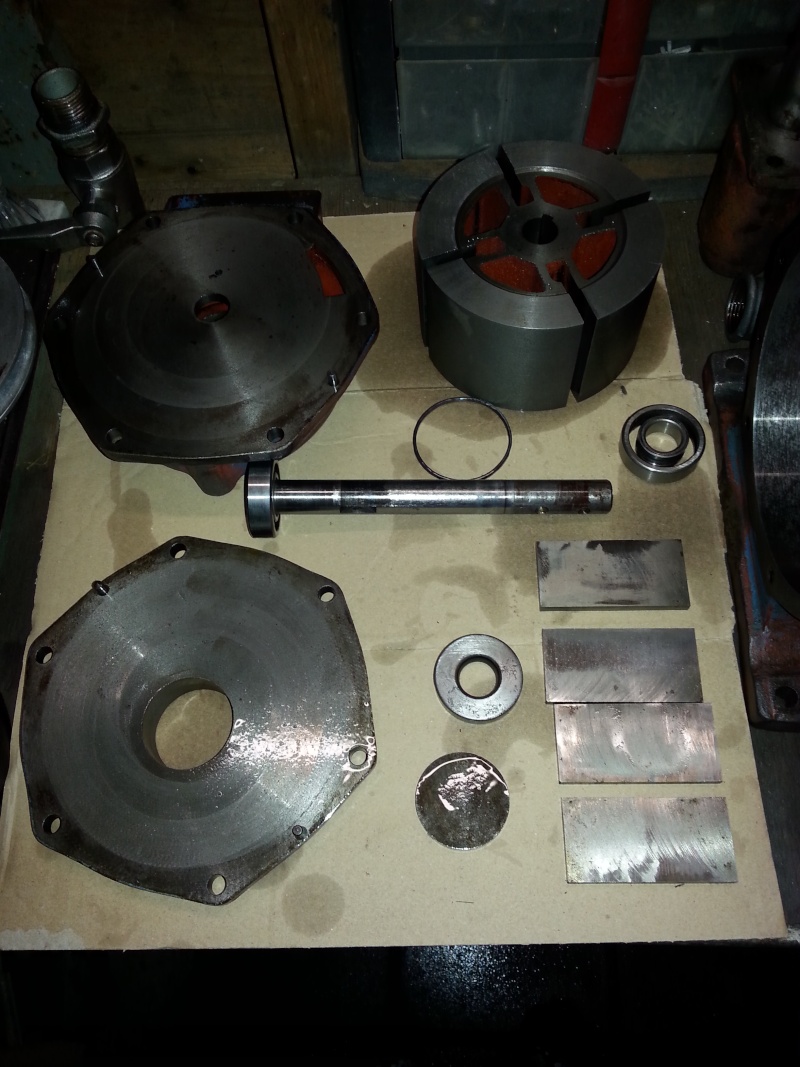
Dismantling the pump is not very difficult; however sometimes things are not as expected.
During the dismantling of the front bearing the outer ring broke. This a standard SKF bearing 6204.
The inner ring could be removed without problems.
At the backside of the pump a cover is pressed where the bearing is located.
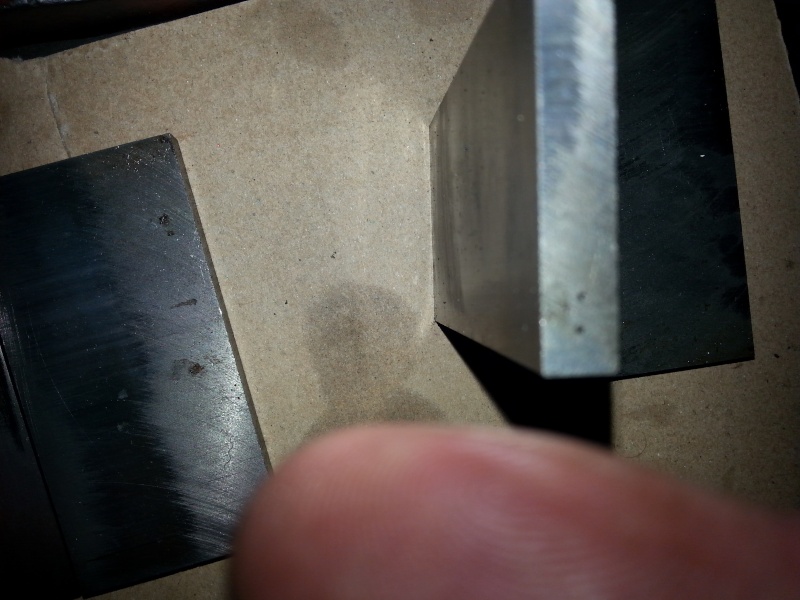
The position of the plates in the pumprotor is marked with points.


Don't know if this was done by an earlier overhauling or maybe from factory.
On the pumpshaft a steel ring (OD 60mm-thickness 2mm) was mounted. Don't know if this should be normal?


Cleaning of the inside was a time consuming job.
50 Year of usage has resulted in a thick layer of a mixture of old oil residue and carbon deposit on the inside of the pump.
After a good clean with dasty it looks much better now.


sprayed a slight layer WD40 on the flat surfaces of the pumpcovers and the rotor to protect them against corrosion.
Will look for replacement bearings and a seal next week.

Wish you all a nice sunday evening.
Best regards,
Steef Pronk
I've decided to overhaul te vacuumpump first before finishing the trolley.
The bearings made some noise and showed some "heavy" points.
Dismantling the pump is not very difficult; however sometimes things are not as expected.
During the dismantling of the front bearing the outer ring broke. This a standard SKF bearing 6204.
The inner ring could be removed without problems.
At the backside of the pump a cover is pressed where the bearing is located.
The position of the plates in the pumprotor is marked with points.


Don't know if this was done by an earlier overhauling or maybe from factory.
On the pumpshaft a steel ring (OD 60mm-thickness 2mm) was mounted. Don't know if this should be normal?


Cleaning of the inside was a time consuming job.
50 Year of usage has resulted in a thick layer of a mixture of old oil residue and carbon deposit on the inside of the pump.
After a good clean with dasty it looks much better now.


sprayed a slight layer WD40 on the flat surfaces of the pumpcovers and the rotor to protect them against corrosion.
Will look for replacement bearings and a seal next week.

Wish you all a nice sunday evening.
Best regards,
Steef Pronk
Last edited by Mark15 user on Fri Jul 03 2015, 13:25; edited 3 times in total

Mark15 user- A true Stationary engine owner

- Posts : 137
Join date : 2014-09-06
Age : 54
Location : Holland
 Stefa seal finally found an alternative
Dear forum members,
It took a long search to find an alternative for the Stefa seal.
During my search on internet I came across the company Pro Sealing in the Netherlands.
http://www.prosealing.nl/
They were very helpfull and found an alternative for the Stefa Seal
I´ve purchased 2 seals (one spare). They will be delivered 6th of May so I have to wait a few days .
.
Will let you know when I received the parts.
Best regards,
Steef Pronk
It took a long search to find an alternative for the Stefa seal.
During my search on internet I came across the company Pro Sealing in the Netherlands.
http://www.prosealing.nl/
They were very helpfull and found an alternative for the Stefa Seal
I´ve purchased 2 seals (one spare). They will be delivered 6th of May so I have to wait a few days
Will let you know when I received the parts.
Best regards,
Steef Pronk
Last edited by Mark15 user on Thu May 21 2015, 20:30; edited 1 time in total

Mark15 user- A true Stationary engine owner

- Posts : 137
Join date : 2014-09-06
Age : 54
Location : Holland
 painting and new sealing
Dear forum members,
Finally some progress on the vacuumpump.
I've received the sealing rings from Prosealing.
It's different from the Original Stefa Seal; hope it will not colapse due to the vacuüm.


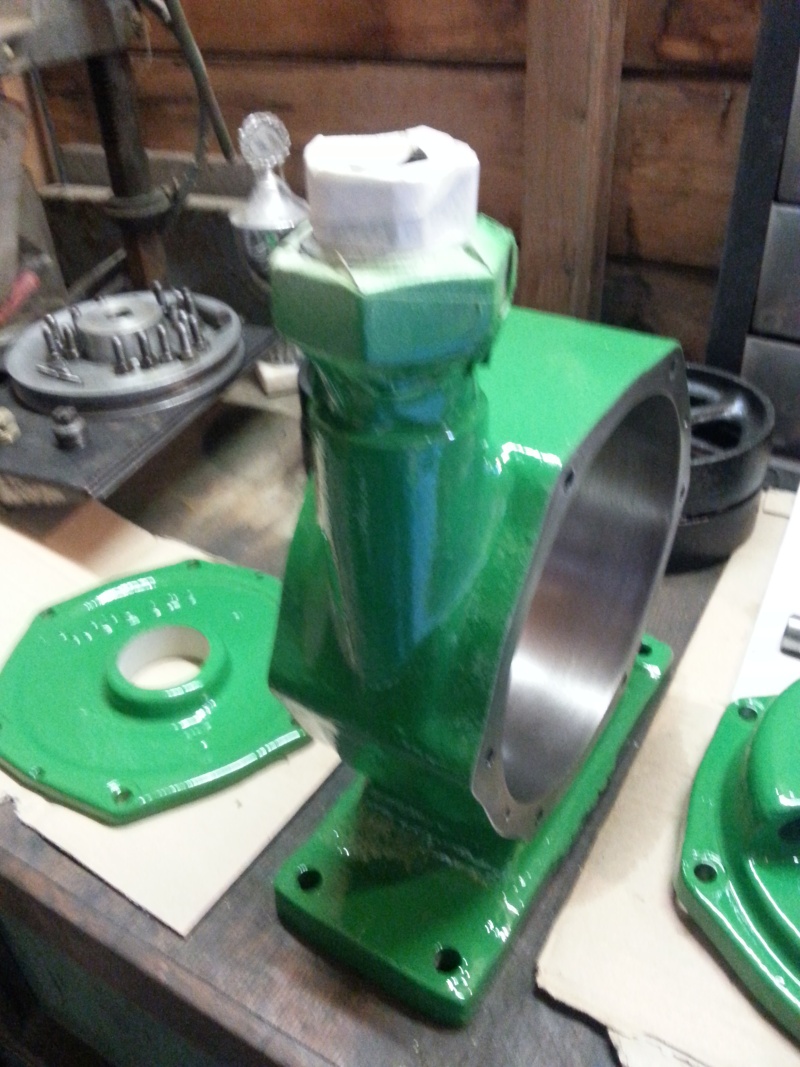
I've decided to paint the pump housing the same color als the Villiers engine.
Sprayed the first layer. After assembly the final layer will be sprayed.


The bearings were ordered at a local car parts shop; however these were closed bearings
So I decided to send them back.
To find an equivalent for the Energol HL80 oil was quite challenging.
Not only the grade; but the minimum order quantity is not suitable for small users.
(one supplier offered me a 200 liter drum )
)
Finally I've found a small local ship suppliershop which is able to deliver 1 liter quantity.
Best regards,
Steef Pronk
Finally some progress on the vacuumpump.
I've received the sealing rings from Prosealing.
It's different from the Original Stefa Seal; hope it will not colapse due to the vacuüm.


I've decided to paint the pump housing the same color als the Villiers engine.
Sprayed the first layer. After assembly the final layer will be sprayed.


The bearings were ordered at a local car parts shop; however these were closed bearings
So I decided to send them back.
To find an equivalent for the Energol HL80 oil was quite challenging.
Not only the grade; but the minimum order quantity is not suitable for small users.
(one supplier offered me a 200 liter drum
Finally I've found a small local ship suppliershop which is able to deliver 1 liter quantity.
Best regards,
Steef Pronk
Last edited by Mark15 user on Thu May 21 2015, 20:33; edited 3 times in total (Reason for editing : pictures added)

Mark15 user- A true Stationary engine owner

- Posts : 137
Join date : 2014-09-06
Age : 54
Location : Holland
 Assembly components
Dear Forum members,
Today I received the bearings and I've decided to assemble the pump.

The pumpshaft was polished to remove damages and rust.

After cleaning the rear bearing was mounted on the shaft.
The shaft was mounted in the back plate
Then the rotor and the front bearing where pressed onto the shaft (rotor including the key)

To ensure a smooth movement of the blades in the rotor 'I've polished carefully the blades.
After that the seal was mounted in the front cover.
See the assembly pictures below. It looks much better now.


(A before picture)

Next step is to spray the outlet cover of the pump.
After completion I wil carefully rub the surface and spray the finish coat.
Visited a local ralley and got some ideas for the trolley.
The trolley project will continue soon in another topic
Best regards,
Steef Pronk
Today I received the bearings and I've decided to assemble the pump.

The pumpshaft was polished to remove damages and rust.

After cleaning the rear bearing was mounted on the shaft.
The shaft was mounted in the back plate
Then the rotor and the front bearing where pressed onto the shaft (rotor including the key)

To ensure a smooth movement of the blades in the rotor 'I've polished carefully the blades.
After that the seal was mounted in the front cover.
See the assembly pictures below. It looks much better now.


(A before picture)

Next step is to spray the outlet cover of the pump.
After completion I wil carefully rub the surface and spray the finish coat.
Visited a local ralley and got some ideas for the trolley.
The trolley project will continue soon in another topic
Best regards,
Steef Pronk

Mark15 user- A true Stationary engine owner

- Posts : 137
Join date : 2014-09-06
Age : 54
Location : Holland
 Re: Benco vacuumpump overhauling update 03072015 dating the pump. Yes it's very old!
Hello Steef,
A really good thread - great to read and interesting to learn of your methods for finding replacement parts - it looks great - keep the updates coming Sir!
Best wishes for an easy restoration!
Hamish
A really good thread - great to read and interesting to learn of your methods for finding replacement parts - it looks great - keep the updates coming Sir!
Best wishes for an easy restoration!
Hamish

StewartH- A credit to the forum

- Posts : 410
Join date : 2013-07-04
Location : Hampshire
 Re: Benco vacuumpump overhauling update 03072015 dating the pump. Yes it's very old!
Nice work as usual Steef
_________________
Regards Paul
Tha can alus tell a Yorkshireman - but tha can't tell him much.

Woodsman- Admin
- Posts : 2819
Join date : 2014-08-24
Age : 73
Location : God's own county
 Finished pictures 01-06-2015
Dear forum members,
After filling up with oil and a final layer of paint the pump is ready.
To cover the bolts from paint I've bought plastic caps at Gamma.

(Cost 1,36GBP per 8 pieces) I guess Wickes should have them too.
I've put grease (vaseline) on the surface of the sealing ring. After painting you can easily wipe of the paint.
See the pictures below.


The valve is still on the pump to avoid entrance of dust.
Best regards,
Steef Pronk
After filling up with oil and a final layer of paint the pump is ready.
To cover the bolts from paint I've bought plastic caps at Gamma.

(Cost 1,36GBP per 8 pieces) I guess Wickes should have them too.
I've put grease (vaseline) on the surface of the sealing ring. After painting you can easily wipe of the paint.
See the pictures below.


The valve is still on the pump to avoid entrance of dust.
Best regards,
Steef Pronk

Mark15 user- A true Stationary engine owner

- Posts : 137
Join date : 2014-09-06
Age : 54
Location : Holland
 Dating the pump (1938 - 1944)
Dear forum members,
I've visited the special collections department of the Wageningen University Library today.
There was more information than expected. Even a partsbook of my C4 pump which showed me roughly the age of my pump.
(1938 - 1944) Never thought that this pump could be that old

In the links chapter you will find the contact data of the special collections department.
http://www.stationaryengineforum.net/t8923-information-source-for-machinery-brochures-netherlands-library-wageningen-university-dpt-special-collections
Best regards,
Steef Pronk
I've visited the special collections department of the Wageningen University Library today.
There was more information than expected. Even a partsbook of my C4 pump which showed me roughly the age of my pump.
(1938 - 1944)

In the links chapter you will find the contact data of the special collections department.
http://www.stationaryengineforum.net/t8923-information-source-for-machinery-brochures-netherlands-library-wageningen-university-dpt-special-collections
Best regards,
Steef Pronk

Mark15 user- A true Stationary engine owner

- Posts : 137
Join date : 2014-09-06
Age : 54
Location : Holland
 Similar topics
» Dutch Villiers Mark 15
» Stuart water pump dating.
» rebuilt to rally frank PEARN water pump ++++ info dating help needed pleaase lads and galls
» Trolley for Villiers Mk15 wooden toolbox new pics 5-9-2016
» Vacuumpump Benco Info needed
» Stuart water pump dating.
» rebuilt to rally frank PEARN water pump ++++ info dating help needed pleaase lads and galls
» Trolley for Villiers Mk15 wooden toolbox new pics 5-9-2016
» Vacuumpump Benco Info needed
Page 1 of 1
Permissions in this forum:
You cannot reply to topics in this forum