Petter A1 Restoration
+10
Tony N
B10Dave
blue cat
Woodsman
Keith-PU8
chiefy
Dougal
Owtfornowt
Appletop
roxburd
14 posters
Page 1 of 3
Page 1 of 3 • 1, 2, 3 
 Petter A1 Restoration
This is more of a cosmetic restoration rather than a full mechanical rebuild.
I'd been looking for an A1 for about 12 months and finally found one at the right price and within reasonable travelling distance.

Unloaded and strapped onto a temporary trolley...
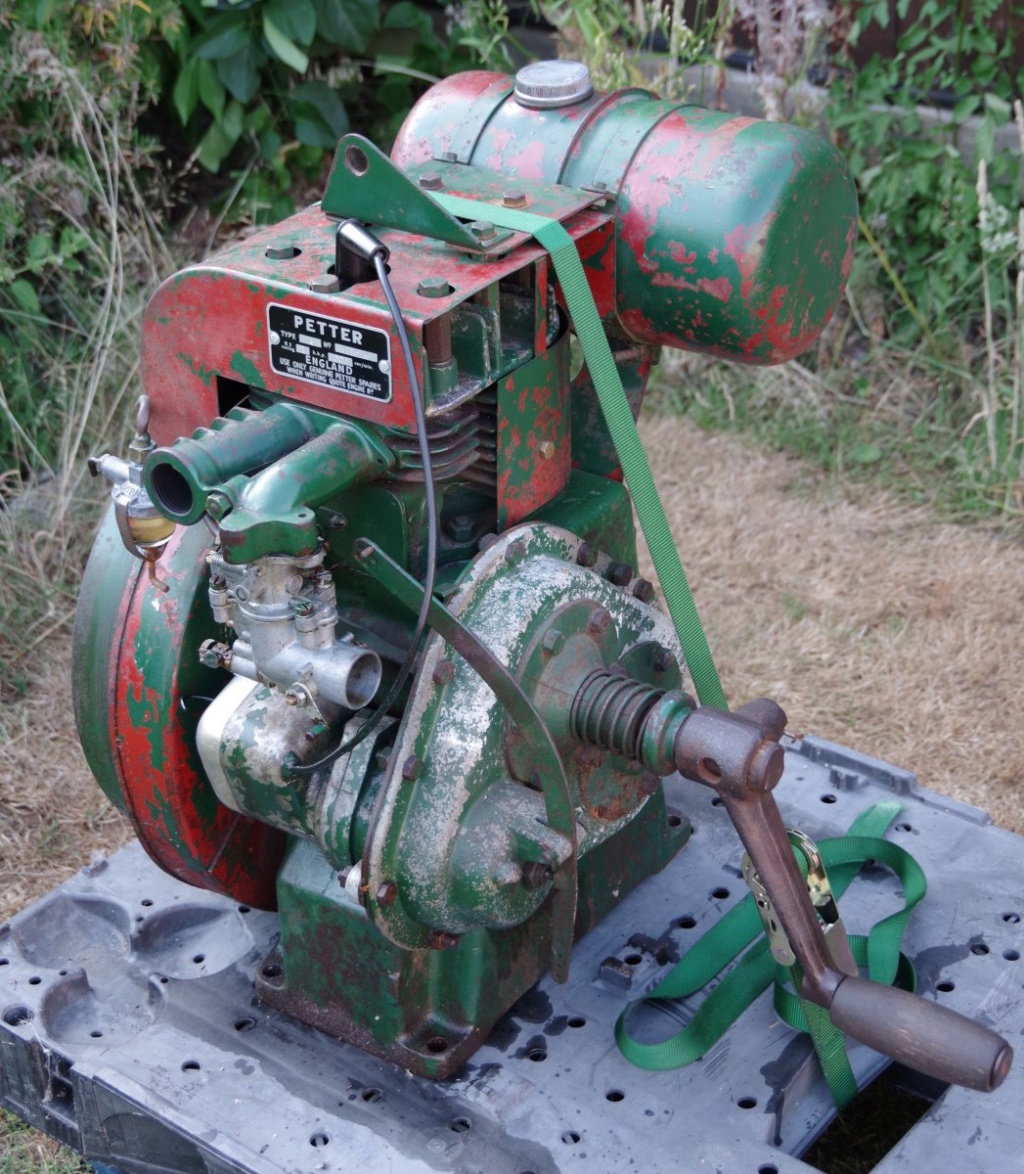
Sent an e-mail to Jim Perkins, but he doesn't have records of such a late build, I believe it may have been built by JH McClaren for Petter when they didn't have the capacity.

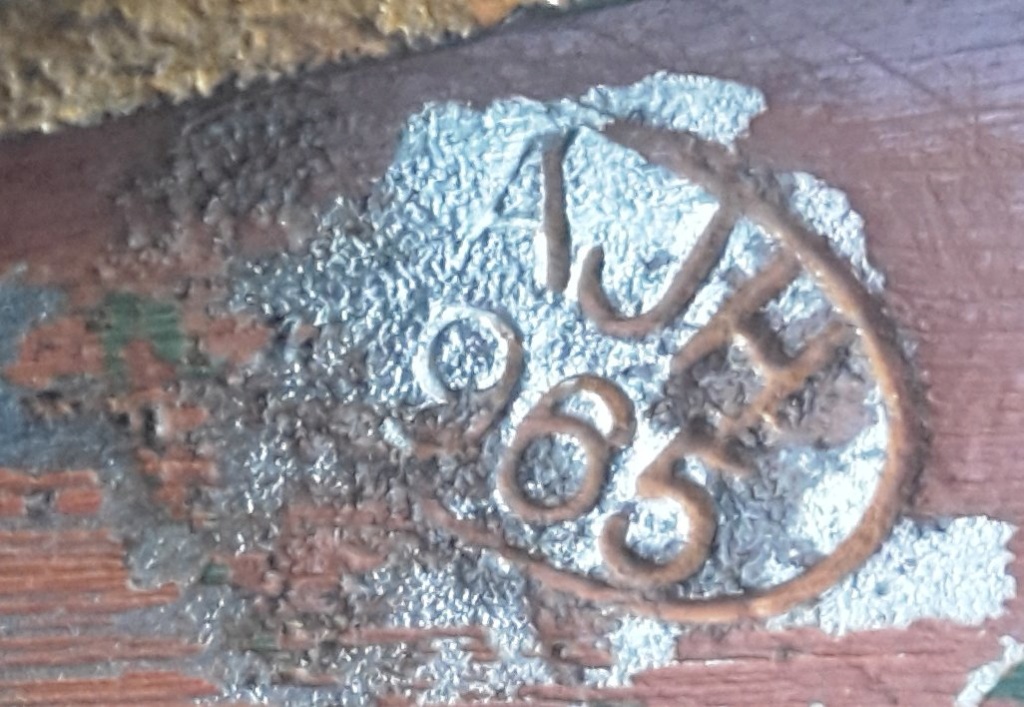
I found a stamp on the fan housing which hopefully means it was made in 1965...
And some numbers stamped on the starter shaft housing which I haven't worked out yet, looks like 69184? with a larger 10 stamped across it...

To be continued.
Stuart.
I'd been looking for an A1 for about 12 months and finally found one at the right price and within reasonable travelling distance.

Unloaded and strapped onto a temporary trolley...

Sent an e-mail to Jim Perkins, but he doesn't have records of such a late build, I believe it may have been built by JH McClaren for Petter when they didn't have the capacity.

I found a stamp on the fan housing which hopefully means it was made in 1965...

And some numbers stamped on the starter shaft housing which I haven't worked out yet, looks like 69184? with a larger 10 stamped across it...

To be continued.
Stuart.
Robotstar5- Life Member

- Posts : 1109
Join date : 2018-09-25
 Re: Petter A1 Restoration
Nice tidy piece - shouldn't take too much effort to get it rally ready. Keep us posted. 
I wonder why they rarely come with an air filter?
I wonder why they rarely come with an air filter?
_________________
Regards Paul
Tha can alus tell a Yorkshireman - but tha can't tell him much.

Woodsman- Admin
- Posts : 2815
Join date : 2014-08-24
Age : 73
Location : God's own county
 Re: Petter A1 Restoration
Woodsman wrote:Nice tidy piece - shouldn't take too much effort to get it rally ready. Keep us posted.
I wonder why they rarely come with an air filter?
The air filters do seem a bit rare, I've missed a couple on Ebay when they went out of my budget.
Stuart.

Robotstar5- Life Member

- Posts : 1109
Join date : 2018-09-25
 Re: Petter A1 Restoration
First job was to remove the flywheel which meant extracting the Gib key

Looks like someone had attacked the key with an angry grinder for some reason I got a new one from Tasman Industries (link in suppliers section) ready for the rebuild

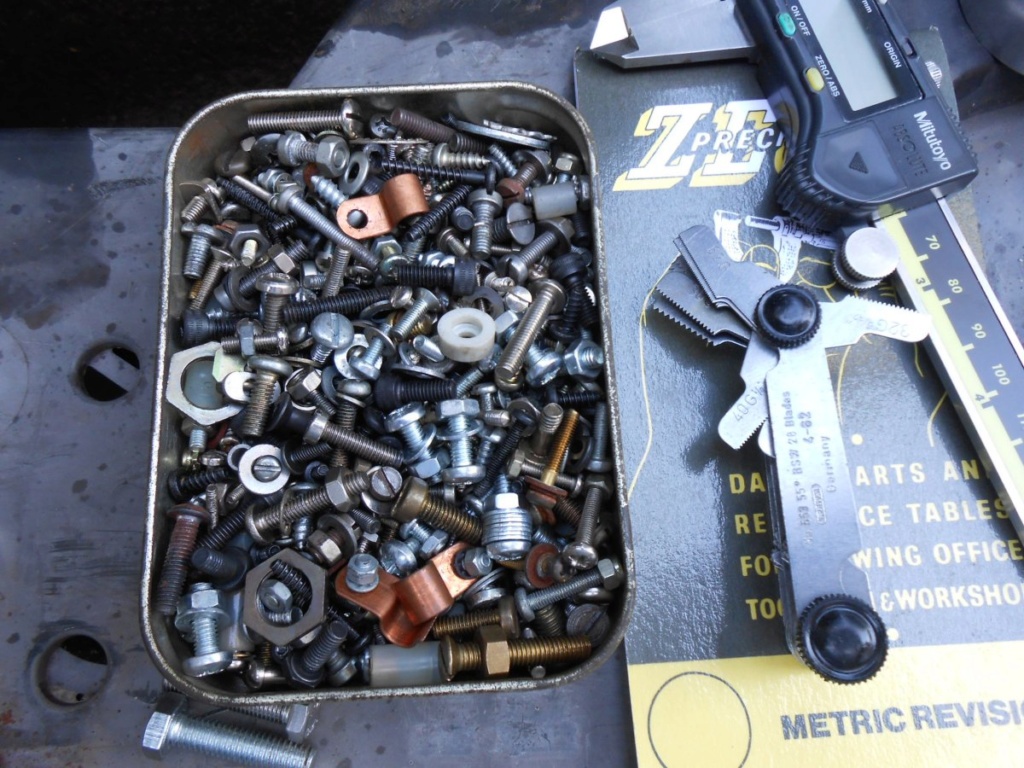
Tools for identifying threads, box of "will come in handy one day" assorted fasteners, digital calipers, pitch gauge and Zeus book
The magneto cover was looking a bit dull
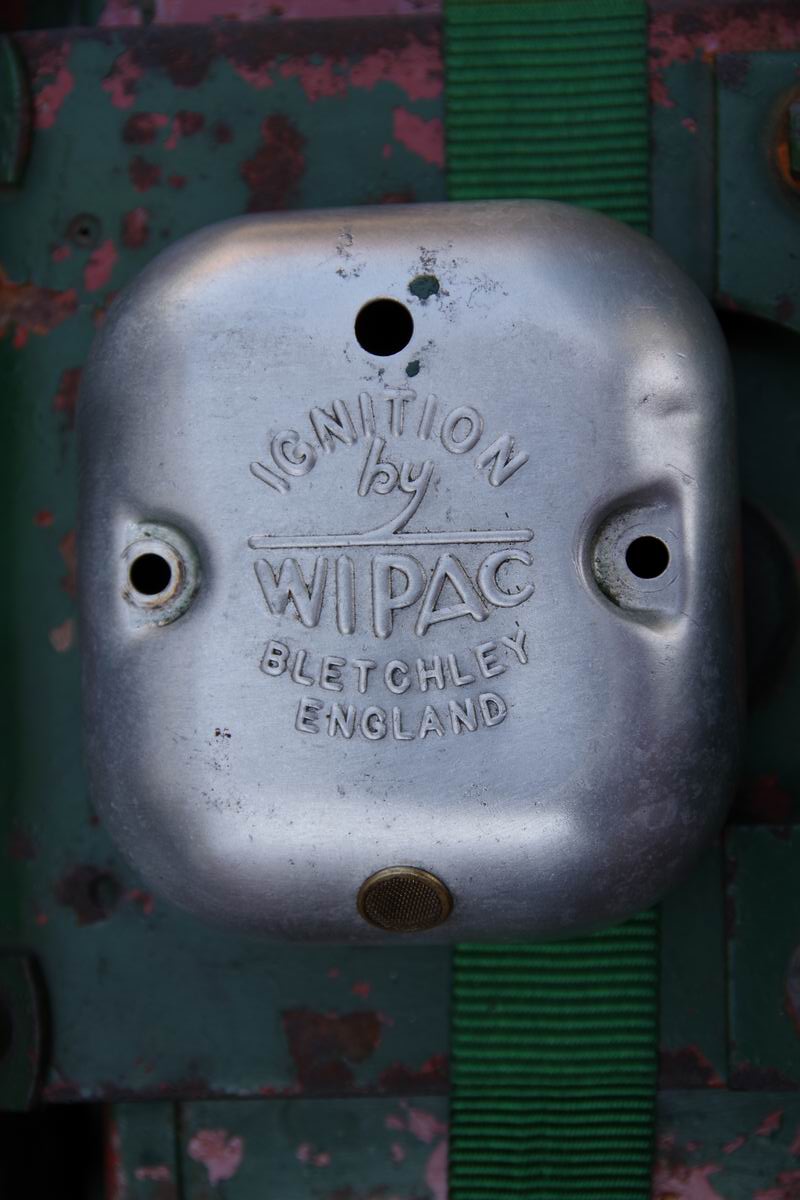
I just happened to have a tube of Autosol....

Don't know how long it will stay shiny
To be continued
Stuart.

Looks like someone had attacked the key with an angry grinder for some reason

Tools for identifying threads, box of "will come in handy one day" assorted fasteners, digital calipers, pitch gauge and Zeus book

The magneto cover was looking a bit dull

I just happened to have a tube of Autosol....

Don't know how long it will stay shiny
To be continued
Stuart.

Robotstar5- Life Member

- Posts : 1109
Join date : 2018-09-25
 The power of the interweb
The spring and adjuster from the end of the governor arm was missing, but someone of one of the Facebook groups had one...

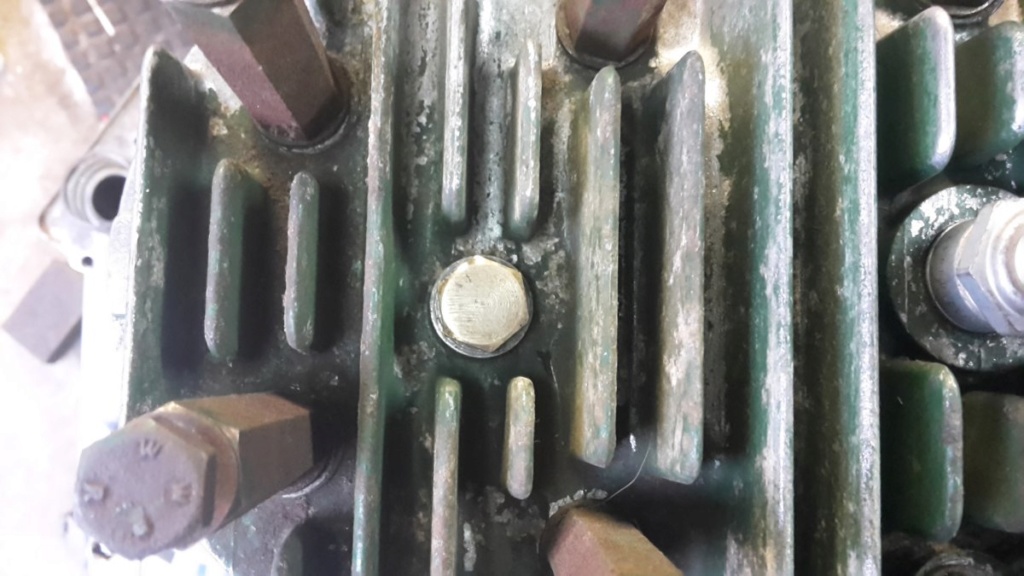
There was a tapped hole in the head plugged by a homemade screw with a slot hacksawed into it

Someone on another engine forum had some that were going for scrap so it just cost me the postage
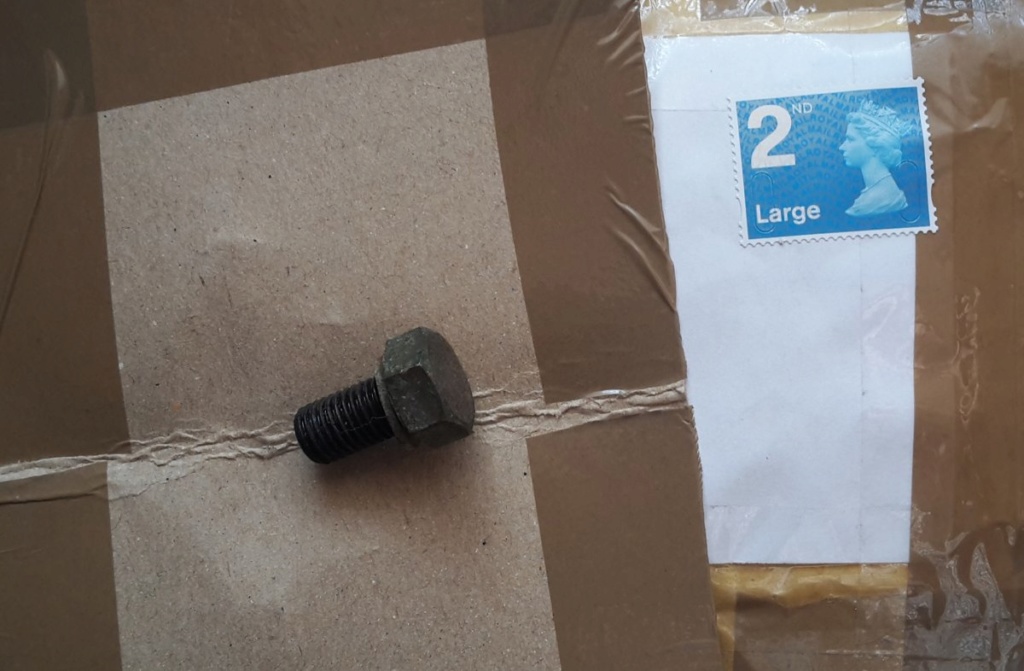
Cleaned up and fitted, looks much better
A lot of the gaskets came off in pieces so after asking about identifying the material used on another (non - engine) forum, one of the members kindly posted me some

My first attempt at making a gasket, looked OK to me and as a bonus it fitted OK too

To be continued
Stuart.

There was a tapped hole in the head plugged by a homemade screw with a slot hacksawed into it

Someone on another engine forum had some that were going for scrap so it just cost me the postage

Cleaned up and fitted, looks much better

A lot of the gaskets came off in pieces so after asking about identifying the material used on another (non - engine) forum, one of the members kindly posted me some

My first attempt at making a gasket, looked OK to me and as a bonus it fitted OK too

To be continued
Stuart.

Robotstar5- Life Member

- Posts : 1109
Join date : 2018-09-25
 Re: Petter A1 Restoration
If the gaskets come off in bits I reassemble them jigsaw style between two pieces of perspex, pop the sandwich in my scanner/printer and save as pdf. Then print directly onto gasket paper if thin enough or plain paper if thicker.
_________________
Regards Paul
Tha can alus tell a Yorkshireman - but tha can't tell him much.

Woodsman- Admin
- Posts : 2815
Join date : 2014-08-24
Age : 73
Location : God's own county
 Re: Petter A1 Restoration
Woodsman wrote:If the gaskets come off in bits I reassemble them jigsaw style between two pieces of perspex, pop the sandwich in my scanner/printer and save as pdf. Then print directly onto gasket paper if thin enough or plain paper if thicker.
That's something to remember for the future, most of mine had the "holes" stuck to one side and the bits in between stuck to the other and I had to scrape them off, plus I was a bit wary dealing with them as there's a good chance they contained Asbestos so dealt with appropriately.

Stuart.

Robotstar5- Life Member

- Posts : 1109
Join date : 2018-09-25
 Re: Petter A1 Restoration
Stripped the tinware off...

and started to clean it up...

The ally gear housing was very powdery...

A lot of wire brushing later...

Masked off and etch primer applied...

Followed by a couple of coats of primer...

A bit of research found later Petters had a light green so I thought I'd try it...

I think if I do it all this colour I'm going to have to issue sunglasses to spectators on the engine lines
To be continued.
Stuart.

and started to clean it up...

The ally gear housing was very powdery...

A lot of wire brushing later...

Masked off and etch primer applied...

Followed by a couple of coats of primer...

A bit of research found later Petters had a light green so I thought I'd try it...

I think if I do it all this colour I'm going to have to issue sunglasses to spectators on the engine lines
To be continued.
Stuart.

Robotstar5- Life Member

- Posts : 1109
Join date : 2018-09-25
 Re: Petter A1 Restoration
I've used a similar green on my Villiers MK40 - a bit bright but at least you won't lose it.
_________________
Regards Paul
Tha can alus tell a Yorkshireman - but tha can't tell him much.

Woodsman- Admin
- Posts : 2815
Join date : 2014-08-24
Age : 73
Location : God's own county
 Re: Petter A1 Restoration
First job of the day was to take the workshop door off and trim a few mm off the bottom to stop it sticking 

Everything cleaned and masked off...

A couple of coats of primer...

The light green was too much so it was back to good old Mid Brunswick Green...

The barrel got a couple of coats of matt black barbeque paint...

To be continued
Stuart.

Everything cleaned and masked off...

A couple of coats of primer...

The light green was too much so it was back to good old Mid Brunswick Green...

The barrel got a couple of coats of matt black barbeque paint...

To be continued
Stuart.

Robotstar5- Life Member

- Posts : 1109
Join date : 2018-09-25
 Re: Petter A1 Restoration
Great progress being made. Nice engine. Will you post a video when it is done and running?

B10Dave- Born to be wild

- Posts : 18
Join date : 2014-01-24
Age : 73
Location : Aylmer Ontario Canada
 Re: Petter A1 Restoration
B10Dave wrote:Great progress being made. Nice engine. Will you post a video when it is done and running?
I'll have a go, but it may be a while as the photo's I've posted so far are "time lapse" taken over the last few months
Stuart.

Robotstar5- Life Member

- Posts : 1109
Join date : 2018-09-25
 Re: Petter A1 Restoration
A few of the parts waiting to be stripped...

I found the factory applied red primer? to be very sound, but the green applied after could be picked off with a finger nail

Tank half done...
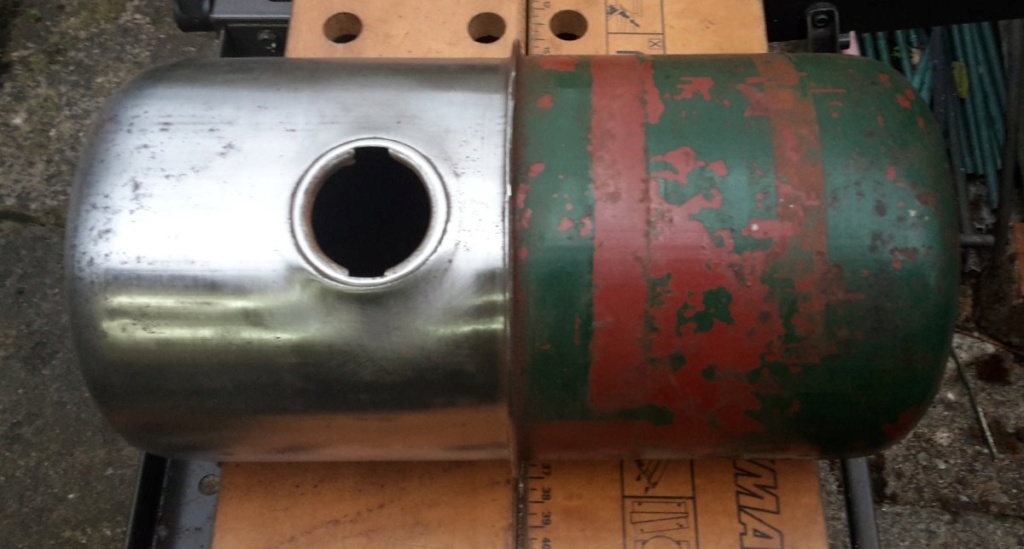
and fully stripped...
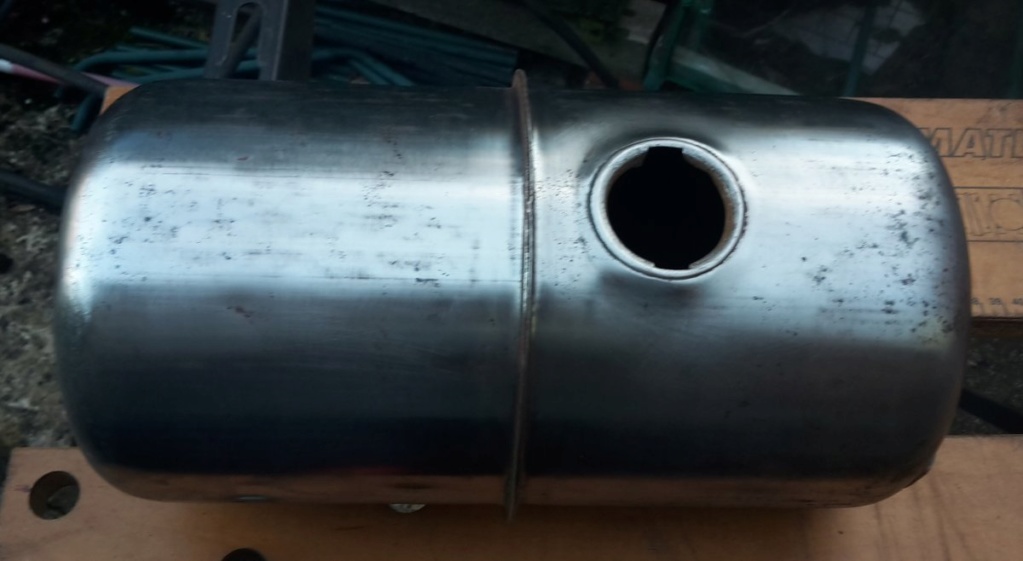
I got through quite a few metres of emery cloth, luckily the company I work for buys it by the roll
A tool I found invaluable was the Abracs stripper discs, link below was the first I found, but can be found cheaper on Ebay ( just make sure they're Abracs)
https://www.toolstation.com/abracs-poly-abrasive-disc/p22693?
More to follow
Stuart.

I found the factory applied red primer? to be very sound, but the green applied after could be picked off with a finger nail

Tank half done...

and fully stripped...

I got through quite a few metres of emery cloth, luckily the company I work for buys it by the roll
A tool I found invaluable was the Abracs stripper discs, link below was the first I found, but can be found cheaper on Ebay ( just make sure they're Abracs)
https://www.toolstation.com/abracs-poly-abrasive-disc/p22693?
More to follow
Stuart.

Robotstar5- Life Member

- Posts : 1109
Join date : 2018-09-25
 Re: Petter A1 Restoration
Ah well, one step forward then two steps back  I noticed a couple of runs in the tank so thought I could flat it off before applying another top coat, it went through to bare metal in a couple of places so as I was priming another project I dusted some on and it reacted causing a crinkle effect. I had to do a lot more flatting off and now it's drying off in shame before I try again.
Stuart.
Stuart.

Robotstar5- Life Member

- Posts : 1109
Join date : 2018-09-25
 Re: Petter A1 Restoration
A few of the bolt-on bits after painting, the tank isn't a lighter shade, it was sunlight making it appear lighter. This was before the "crinkles" incident...

A few bits bolted back on, just got to clean up the bolt heads before painting...

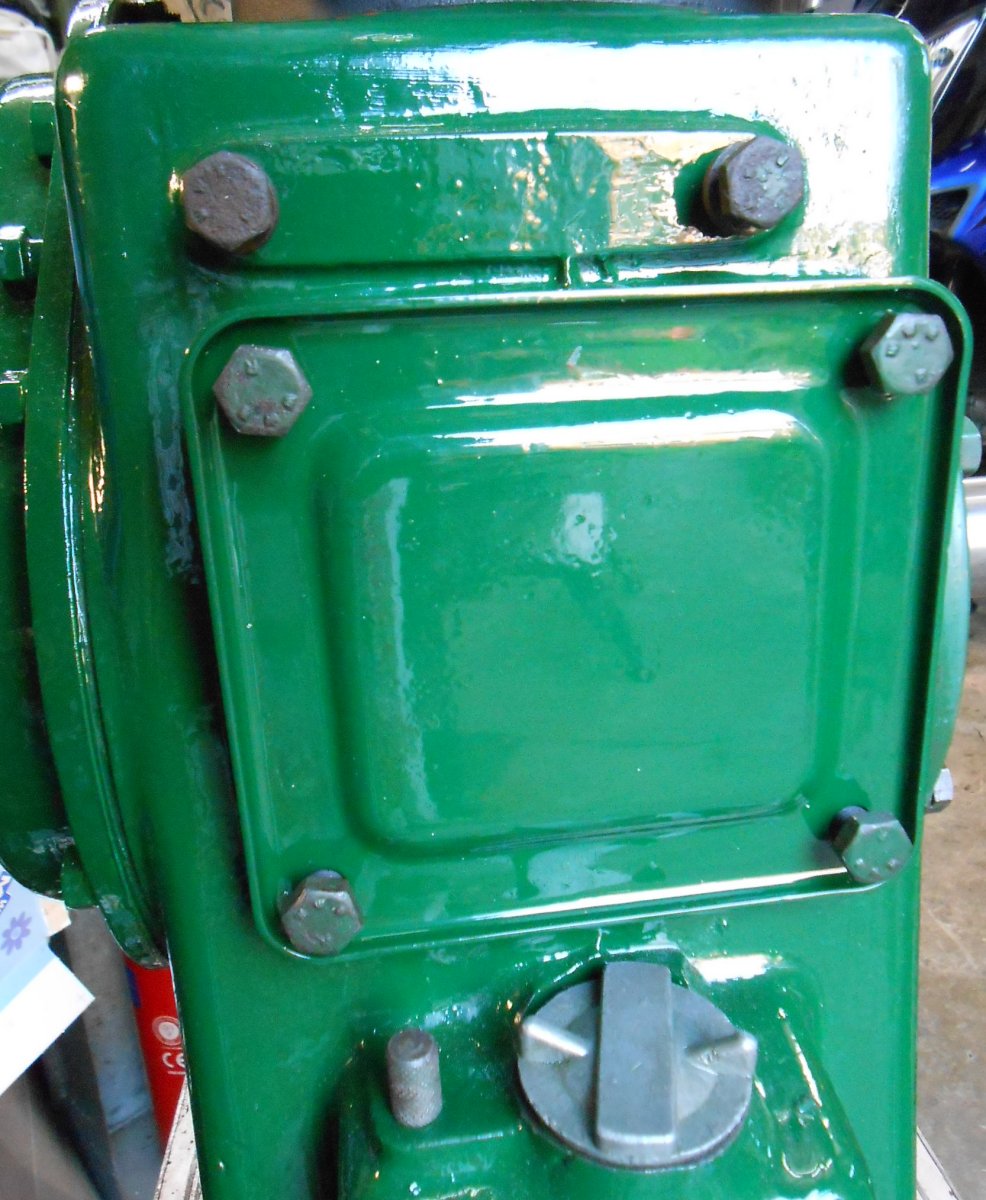
I think that may be it for a while as it's too cold to do any more painting.
Stuart.

A few bits bolted back on, just got to clean up the bolt heads before painting...


I think that may be it for a while as it's too cold to do any more painting.
Stuart.

Robotstar5- Life Member

- Posts : 1109
Join date : 2018-09-25
 Re: Petter A1 Restoration
Nice write-up, good to see. Keep up the good work!
I have a question - I have a Lister which I've stripped but the project has stalled. I've had the power wire brush over it and it looks a lot like your engine casings in your photo captioned "and started to clean it up...", except I'm paranoid about painting it and rust coming straight back through so I've had a really good go with the wire brush and so it's fairly shiny.
The thing is, I know there's still rust in the pits on the metal surface... so what's to stop it coming back through when I paint it?? It's probably just my ignorance of paint technology - is it just a case of choosing the right primer? Any advice much appreciated!
roxburd- Posts : 4
Join date : 2012-10-07
 Re: Petter A1 Restoration
Should be fine with a coat of red oxide then undercoat, if you are that worried you can get "rust converter" to paint over everything first but most don't bother.

Appletop- Life Member

- Posts : 1483
Join date : 2010-01-02
Age : 56
Location : Just outside Diss
 Re: Petter A1 Restoration
I had some pitting that still looked a bit rusty, the Abracs disc got rid of most of it, once it was stripped I gave it a wipe down with proper panel wipe as it leaves no residue and cleans out any dips, wait for it to dry then 2 coats of red oxide primer.
As it's a bit warmer I did a bit today, final flatting on the tank followed by panel wipe ready for paint tomorrow, hope it doesn't run this time.
Finished cleaning the top engine cowl and gave that a couple of coats of primer, forgot to get pics today.
I did notice the stuff that's been in primer for a few months in a cold damp garage is showing no signs of rust coming through.
Stuart.

Robotstar5- Life Member

- Posts : 1109
Join date : 2018-09-25
 Re: Petter A1 Restoration
Took advantage of the unseasonable mild weather the last couple of days...
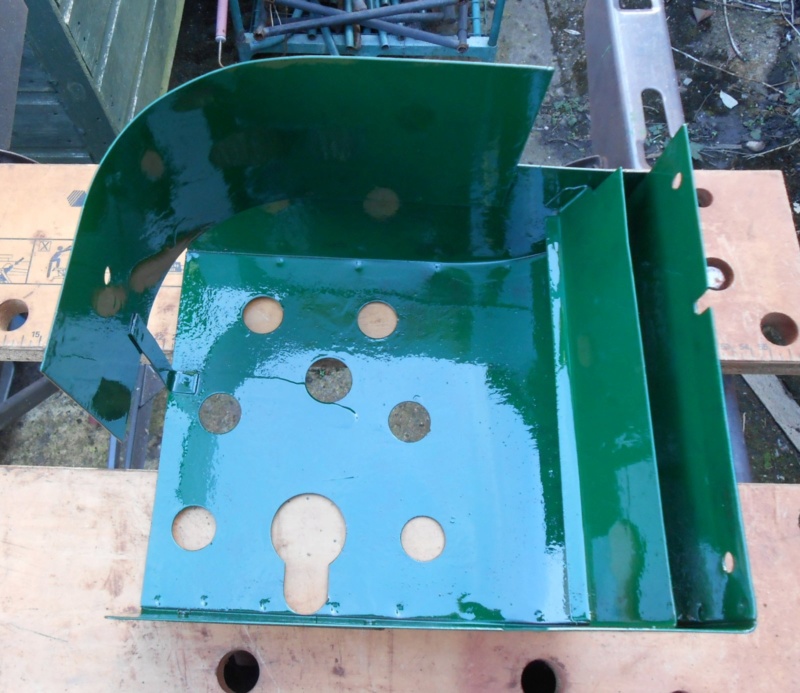
Top cowl after a couple of coats of primer...

and painted inside, even though most folks will never see it...
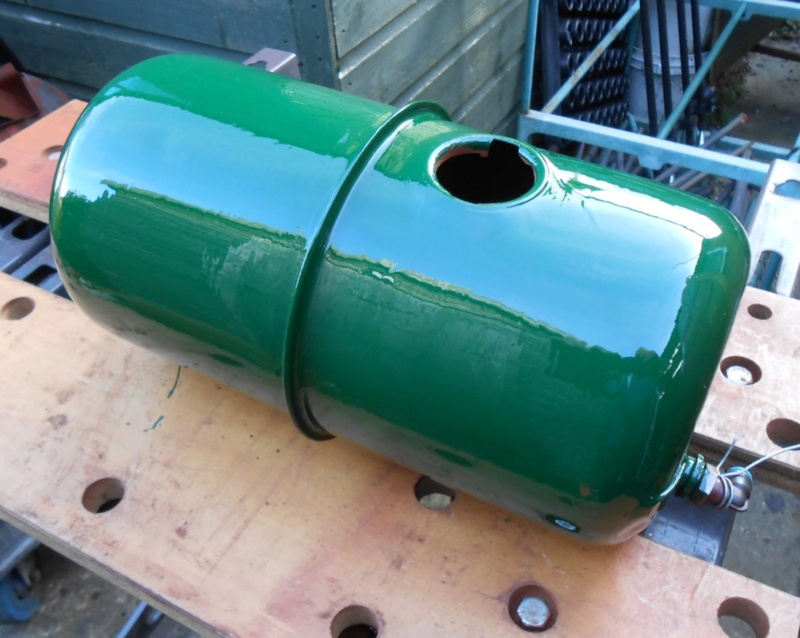
Third attempt on the tank, doesn't look too bad this time...
Took a couple of hours to prep the flywheel housing...

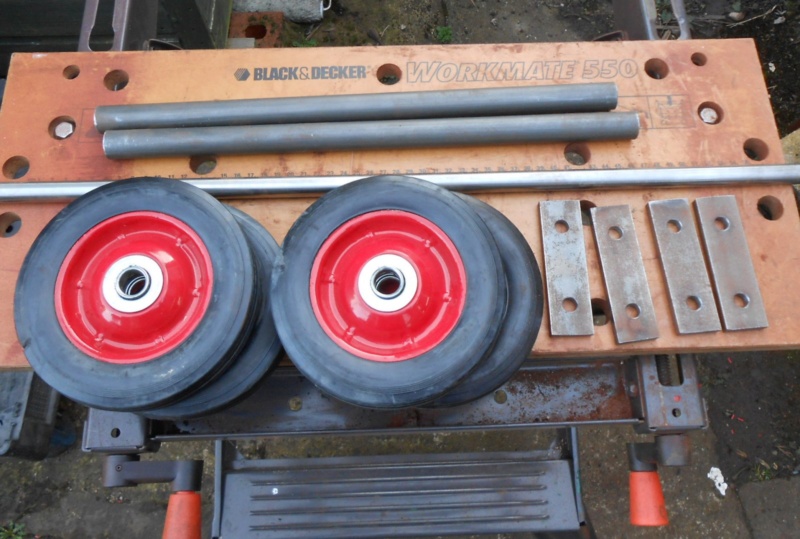
Sorting out the parts to start building the trolley...
Forecast is looking good for the weekend so hope to make progress.
Stuart.
Top cowl after a couple of coats of primer...

and painted inside, even though most folks will never see it...

Third attempt on the tank, doesn't look too bad this time...

Took a couple of hours to prep the flywheel housing...

Sorting out the parts to start building the trolley...

Forecast is looking good for the weekend so hope to make progress.
Stuart.

Robotstar5- Life Member

- Posts : 1109
Join date : 2018-09-25
 Re: Petter A1 Restoration
Just more painting and trolley design today, but while waiting for paint to dry I finished another little project for Mrs Robo.
She bought a gas powered heated horse shower (don't ask me why horses need a hot shower) which was cable tied to a folding sack truck, the "official" wheeled stand was north of £80 so I made something else...

Got a basic sack truck from the local DIY shed, drilled and tapped a couple of mounting bars, nice and stable with room for the gas bottle underneath.
Stuart.
She bought a gas powered heated horse shower (don't ask me why horses need a hot shower) which was cable tied to a folding sack truck, the "official" wheeled stand was north of £80 so I made something else...

Got a basic sack truck from the local DIY shed, drilled and tapped a couple of mounting bars, nice and stable with room for the gas bottle underneath.
Stuart.

Robotstar5- Life Member

- Posts : 1109
Join date : 2018-09-25
 Petter A1 restoration
Looks good, started one myself before Christmas but I’m sort of lost is there any literature out there on petter A1 restoration.

Owtfornowt- Posts : 2
Join date : 2019-02-08
Location : Darfield
 Re: Petter A1 Restoration
Owtfornowt wrote:Looks good, started one myself before Christmas but I’m sort of lost is there any literature out there on petter A1 restoration.
None that I know of, plenty of help on here and the various FB groups.
Start a thread, stick some photo's in and ask away.
_________________
Stuart

Robotstar5- Life Member

- Posts : 1109
Join date : 2018-09-25
 Re: Petter A1 Restoration
Looks very nice... I was planning on hand-painting the tinware on my Villiers Mk10, but am impressed with the spray finish. Is this from a 'rattle can'? And do you use etch primer on the aluminium only?
Thanks...
Thanks...
Dougal- Born to be wild

- Posts : 30
Join date : 2016-09-28
Age : 61
Location : Herefordshire
 Re: Petter A1 Restoration
I only used etch primer on the gear cover then everything got a couple of coats of red oxide primer, both rattle can, all the green bits are done with hand brushing enamel. I would probably have got a better finish by spraying, but I don't have the kit and the enamel being thicker covers any minor imperfections 
_________________
Stuart

Robotstar5- Life Member

- Posts : 1109
Join date : 2018-09-25
Page 1 of 3 • 1, 2, 3 
 Similar topics
» Petter A11 1947 restoration
» Petter A1 restoration
» Petter A1 restoration project
» two petter a' for restoration.
» Petter av2 restoration
» Petter A1 restoration
» Petter A1 restoration project
» two petter a' for restoration.
» Petter av2 restoration
Page 1 of 3
Permissions in this forum:
You cannot reply to topics in this forum